Eleven Flat Roof Inspection Points That Separate a $500 Fix From a $50,000 Failure
A commercial flat roof rarely fails all at once. More often, it surrenders territory incrementally—a lifted seam here, a clogged drain there, a flashing detail that was never fully adhered. By the time water appears on the ceiling of a tenant space or warehouse floor, the underlying damage has typically been compounding for months, sometimes years.
For contractors and facility managers responsible for commercial portfolios, the inspection process is the single most effective intervention point in the asset protection cycle. The challenge is not simply performing inspections—it is knowing precisely where to look and what to document when the problems are still manageable.
The following eleven checkpoints represent the areas most consistently overlooked during routine flat roof inspections. Each one carries disproportionate risk relative to its size. Treat this list as a working reference, not a formality.
1. Membrane Seams at Field Laps
On single-ply systems—TPO, EPDM, and PVC alike—field lap seams are the first line of defense against water infiltration. They are also among the first to fail. Heat-welded seams on TPO and PVC can delaminate at the edges when installation temperatures were marginal or when the weld width fell below manufacturer specifications (typically 1.5 inches minimum).
During inspection, probe every accessible seam with a rounded seam probe tool. Any seam that opens under light pressure or shows edge lifting requires immediate attention. Photograph the full length of suspect seams and note linear footage—this directly informs repair scope and cost estimates.
What it costs if missed: A 40-foot delaminated lap seam on a TPO system, left through one winter freeze-thaw cycle, can allow enough moisture migration to saturate the underlying insulation board across a 200-square-foot section. Insulation replacement, membrane removal, and re-installation in that zone can run $8,000–$14,000 on a mid-size commercial building.
2. T-Joint Intersections
Where three membrane panels meet—commonly referred to as T-joints—the geometry creates a point of concentrated stress and a potential gap in the weld. Many installation crews patch these with a small membrane patch or T-joint cover. Inspect these closely for lifting edges, cracking, or incomplete adhesion. T-joints that were patched improperly during original installation are among the most common sources of pinhole leaks.
3. Penetration Flashings
Every pipe boot, HVAC curb, skylight frame, and equipment support that penetrates the roof membrane represents a discontinuity that must be sealed with flashing. Over time, flashing sealants at the termination edge dry out, crack, and separate—especially in climates with significant UV exposure or thermal cycling.
Check the top termination edge of every flashing for sealant condition. Probe for soft spots beneath the flashing material that may indicate moisture has already entered. On built-up and modified bitumen systems, look for blistering or fishmouthing at flashing edges.
What it costs if missed: A failed pipe boot flashing on a rooftop HVAC unit is frequently the entry point for water that travels along the unit's curb and appears as a ceiling stain 15 to 20 feet from the actual penetration. Misdiagnosis leads to unnecessary interior repairs before the true source is identified—adding $3,000–$7,000 in wasted remediation costs.
4. Parapet Wall Cap Flashings
Parapet walls are among the most exposure-intensive elements on any flat roof. The cap flashing—the metal or membrane cover over the top of the parapet—must remain watertight at all laps and terminations. Metal cap flashings are particularly prone to open laps when the underlying caulk joint fails, allowing water to run directly behind the vertical flashing and into the wall assembly.
During inspection, walk the full perimeter of every parapet. Check lap joints for open seams and look for staining or efflorescence on the interior face of the parapet wall, which often indicates chronic water infiltration.
5. Edge Metal and Drip Edges
Edge metal secures the membrane perimeter and directs water away from the fascia. When edge metal cleats corrode, loosen, or were improperly spaced during installation, the membrane edge can lift under wind uplift pressure. Once lifted, the membrane becomes vulnerable to progressive peeling across the entire field.
Check for any movement, corrosion at fastener points, and gaps between edge metal sections. On older buildings, verify that edge metal meets current wind uplift requirements for your region—many older installations were designed to standards that have since been updated.
6. Roof Drains and Drain Bowls
Drainage failure is one of the most predictable and preventable causes of structural damage on commercial flat roofs. Drains clogged with debris cause ponding water, which accelerates membrane degradation and adds dead load to the deck. But the drain bowl itself—the cast iron or PVC clamping ring assembly that connects the membrane to the drain body—is frequently overlooked.
Remove drain strainers and inspect the clamping ring bolts for tightness. Check the membrane at the drain flange for tears or separation. Standing water around a drain after rainfall has cleared is a diagnostic indicator of a partially obstructed or improperly sloped drain field.
What it costs if missed: Chronic ponding water at a single drain location can compromise a 500-square-foot area of insulation and decking within two to three seasons. Full deck replacement in a localized zone, including membrane, insulation, and structural repair, commonly ranges from $18,000 to $35,000 depending on deck type.
7. Interior Drains vs. Scuppers: Both Require Attention
Buildings that rely on scuppers rather than interior drains present a different inspection challenge. Scupper openings must be clear of debris, and the through-wall flashing that connects the scupper to the roof membrane must remain fully adhered. Check scupper liners for cracks and verify that overflow scuppers—often installed as a secondary drainage measure—are not blocked.
8. HVAC Equipment Supports and Curbs
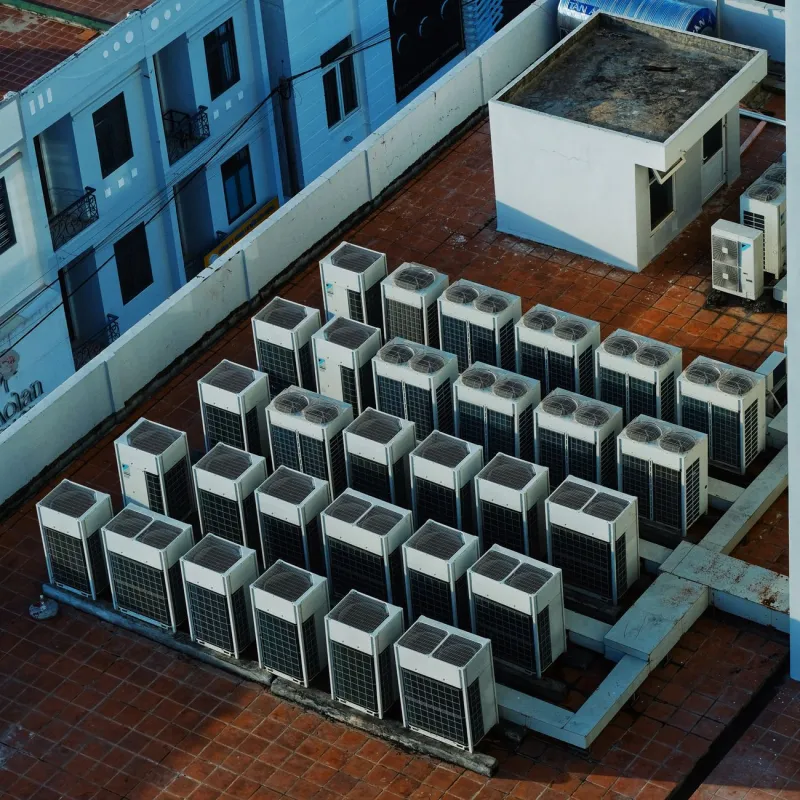
Rooftop mechanical equipment is a constant source of membrane stress. Equipment curbs must be flashed on all four sides with a minimum 8-inch flashing height above the finished membrane surface. Inspect the flashing at all four corners of each curb, as corner miters are the most common failure point. Also check for membrane damage caused by vibration from improperly isolated equipment.
9. Blistering and Ridging in the Field
Blisters—raised bubbles in the membrane or built-up system—indicate trapped moisture or air beneath the surface. Small blisters may be stable, but large or growing blisters represent active delamination. Ridging, a linear raised pattern across the membrane field, typically indicates movement in the substrate or insulation joints telegraphing through the membrane.
Document blister size and location with photographs and measurements at each inspection. Tracking changes over successive inspections reveals whether the condition is stable or progressing.
10. Roof Hatches and Access Points
Roof access hatches are low-priority items that consistently generate high-cost problems. Hatches that do not seal properly allow condensation and air infiltration that can saturate adjacent insulation. Inspect the hatch frame flashing, the gasket seal, and the hardware. A hatch that requires significant force to close is not sealing correctly.
11. Photographic Documentation and Comparison
The inspection itself is only as valuable as the record it produces. Each checkpoint should be photographed with sufficient detail to allow comparison at the next inspection cycle. Facility managers and contractors who maintain a sequential photo record of the same inspection points over multiple years gain the ability to detect slow-developing conditions before they cross the threshold into emergency repairs.
Digital inspection platforms that geo-tag photographs to a roof plan are now widely available and affordable. For portfolios of five or more buildings, this capability is no longer optional—it is a baseline operational requirement.
Making the Checklist Work
A flat roof inspection that moves through these eleven checkpoints systematically—twice per year at minimum, with additional inspections following significant weather events—is the most reliable mechanism for protecting the capital value of a commercial roofing asset. The cost of a thorough inspection is measured in hours. The cost of the problems it prevents is measured in tens of thousands of dollars.
For contractors, delivering this level of documented inspection creates a differentiated service offering and builds the kind of long-term client relationships that generate recurring maintenance contracts. For facility managers, it provides the documented evidence required to support capital budget requests before a crisis forces the issue.